

Remote Physical Exam Techniques for Telemedicine: Clinical Workflows, Diagnostic Aids, and RPM Interpretation
Telemedicine is no longer a triage afterthought. With reproducible workflows, the right peripheral devices, and concise patient scripting, clinicians can perform high-quality remote physical exams. These exams change management and reduce unnecessary in-person visits. This article provides clinician-ready protocols, device selection guidance, patient-facing exam scripts, and documentation/coding pointers you can adopt today.
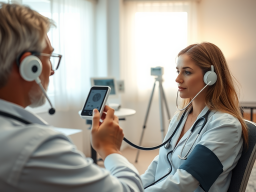
[Infographic of a step-by-step remote physical exam workflow with minute markers](IMAGE: remote-telemedicine-workflow-info-graphic)
What you’ll learn
- Step-by-step telemedicine workflows for common complaints, including minute-by-minute visit templates
- Which diagnostic aids to use, how to integrate them into visits, and interpretation limits
- Patient scripting and safety checks for caregiver-assisted exams
- Documentation, consent language, and coding pointers linked to RPM and remote exams (see telehealth billing and documentation)
Section A — End-to-end Telemedicine Workflow for a Remote Physical Exam
Keywords: remote physical exam techniques telemedicine, video guided physical exam protocols, telehealth diagnostic aids checklist
Structured workflows reduce variability, speed visits, and improve decision-making. Clinic pilots report measurable throughput gains when visits follow a reproducible sequence and need pre-visit device checks. According to industry reporting (e.g., McKinsey and HIMSS analyses), adoption of device-assisted telehealth has increased in recent years as workflows mature; patient access remains tied to broadband and smartphone availability (see Pew Research Center data linked below). For examples of implementation, visit our blog to review preoperative telehealth workflows. There you will also find other clinic guides with process templates and lessons learned (see telehealth resources and updates).
Pre-visit preparation and consent
Checklist (scheduling team / triage nurse)
- Confirm platform and appointment link; verify patient has device with camera and microphone.
- Ask the patient to list available peripheral devices. These could include a home BP cuff, pulse oximeter, or thermometer. A smartphone camera, virtual otoscope, or digital stethoscope could also be listed if they have one.
- Send brief pre-visit email/SMS with:
- Link to test call with instructions for camera framing and lighting
- Short how-to attachments: taking an ear photo, measuring BP, placing pulse oximeter
- Consent language: “This visit will include patient-guided physical exam and remote monitoring data collection. By participating you consent to transmission and documentation of device data.” (Document verbal consent at start of visit.)
- Triage checklist for scheduling: Is the complaint appropriate for a remote exam? (If severe dyspnea, unstable vitals, suspected sepsis or major trauma — schedule urgent in-person or ED referral.)
Script snippet for scheduling nurse (copy-paste)
- “Hi, this is [Name] from [Clinic]. For your virtual visit, do you have access to a smartphone or tablet with a camera? Do you have a blood pressure cuff or pulse oximeter? We’ll guide you through device checks on the call; please be near good lighting and someone to assist if possible.”
Data note: According to the Pew Research Center, a large majority of U.S. adults own smartphones. Most homes have broadband access. However, gaps remain in rural and low-income communities. Plan for alternatives (landline triage, in-person options) where access is limited.
Visit flow — timed, reproducible sequence
Use a minute-by-minute template so visits stay efficient and comparable across clinicians.
Suggested 25-minute visit template (adjust to your clinic’s slot length)
- Connection verification (0–2 min)
- Confirm patient identity, location, emergency contact, caregiver present.
- Confirm verbal consent for remote exam and data capture; document.
- Focused history (2–6 min)
- Brief scripted problem-focused questions (onset, severity, red flags).
- Guided vitals / RPM collection (6–10 min)
- Ask patient to show device(s) on camera, demonstrate use; collect at least two measurements if abnormal.
- Clinician prompts: “Please sit, rest for 5 minutes. Wrap the cuff snugly on your upper arm. Sit with feet flat and arm supported at heart level. Start the BP reading now.”
- Video-guided system exam (10–20 min)
- Follow condition-specific script (ENT, skin, cardio/respiratory, etc.). Use caregiver assistance for palpation when needed.
- Record any device data timestamps and note limitations.
- Assessment, plan, and escalation instructions (20–25 min)
- Review findings, plan treatment, and set clear criteria for in-person escalation.
- Document follow-up and RPM device plan if applicable.
Clinician prompts (examples)
- “On a scale 0–10 where 10 is worst, how is your breathing now?”
Operational impact: Health systems that standardized telemedicine visit templates report shorter variation in visit lengths. They also report higher throughput. See internal case studies and operational reports for quantified time-savings.
Documentation & coding checklist
What to capture in the chart (minimum)
- Consent: Verbal informed consent for telemedicine and RPM, with timestamp.
- Platform used and whether visit was audio-video.
- Devices used: brand/model (if known), measurements with timestamps, patient posture/position during measurement.
- Description of video exam maneuvers performed and limitations (e.g., poor lighting, limited view).
- Clinical decision-making and rationale for remote management vs escalation.
- RPM care plan and billing codes used.
Coding and payer notes
Section B — Diagnostic Aids & Device Choice: What to Buy and When
Keywords: virtual otoscope use telehealth, telehealth diagnostic aids checklist, rpm vitals interpretation telehealth
Clinics must balance cost, interoperability, and diagnostic value. The next device guidance helps match complaints to peripheral tools you should consider stocking, loaning, or recommending.

Device matrix by complaint
Complaint → Recommended device(s) → Cost range (approx.) → Expected diagnostic value
- ENT (ear pain, otitis media, ear discharge)
- Device: virtual otoscope or smartphone-compatible oto-adapter
- Cost: consumer ~$100–300; clinical-grade ~$500–2,000
- Skin lesions / rashes / wounds
- Device: smartphone with high-resolution camera; optional dermatoscope attachment
- Cost: camera = existing smartphone; dermatoscope ~$50–400
- Respiratory complaints (cough, dyspnea)
- Device: pulse oximeter, home spirometry (select), digital stethoscope for lung sounds
- Cost: pulse ox consumer ~$20–70; digital stethoscope clinical-grade ~$300–1,500
- Cardiovascular (palpitations, edema, hypertension)
- Device: validated home BP cuff (upper-arm), wearable ECG patch or consumer single-lead ECG (e.g., Kardia)
- Cost: BP cuff consumer ~$30–120; wearable ECG consumer/medical ~$100–400
- Pediatric exams
- Device: virtual otoscope, pulse ox, thermometer, caregiver-assisted maneuvers
- Cost: same ranges; consider loaner kits for practices with high pediatric telemedicine volume.
Data and concordance: Multiple comparative studies report reasonable concordance for tele-otoscopy, teledermatology, and digital-stethoscope-assisted exams in selected scenarios. Yet, performance varies by image or sound quality. It also depends on operator skill. A systematic review in the telehealth literature examined teledermatology diagnostic accuracy. It found that the accuracy is generally good when high-quality images are provided (see Sources & Further Reading).
Integration & data flow
Integration choices:
- Real-time streaming: clinician views live device feed during visit (best for immediate decisions).
- Asynchronous upload: patient uploads photos or recorded sounds before visit (useful for intermittent symptoms and bandwidth-limited situations).
EMR/API considerations
- Ensure vendor signs a BAA and supports HIPAA-compliant transmission.
Low-bandwidth tips
- Use asynchronous still photos rather than live video for skin and ear images.
- Pre-visit instructions for compressing images or using lower-resolution uploads if necessary.
- Prioritize pulse oximetry numerics and BP readings over live-audio auscultation when bandwidth is constrained.
Practical tips for patients
- For otoscopy: tilt head, pull auricle posteriorly (adults) or downward (infants), move slowly and stop if pain increases.
Cost/quality tradeoffs and procurement checklist
Consumer vs clinical-grade tradeoffs
- Consumer devices: low cost, accessible, suitable for screening and trend-following; may lack robust data export and validation.
- Clinical-grade devices: higher upfront cost, better accuracy, warranty and technical support, integration-friendly.
Purchasing checklist for clinic managers
- Device accuracy evidence and any FDA clearance (if applicable)
- Data export/API capabilities and compatibility with your EMR
- Vendor BAA and security posture
- Warranty, support, and training availability
- Usability for patients (simple instructions, battery life)
- Cost-benefit analysis: expected utilization and whether to loan devices vs recommend patient purchase
Market context: Industry reports by HIMSS and McKinsey highlight procurement barriers such as interoperability and cost. Pilot loaner programs can mitigate patient access gaps for targeted populations.
Section C — Patient-Guided Exam Techniques by System
Keywords: patient self exam instructions telehealth, remote cardiovascular exam telemedicine workflow, video guided physical exam protocols
Remote exams succeed when clinicians give short, exact instructions and set expectations for safety and limitations. Below are copy-ready scripts and stepwise exams for common systems.

When to escalate to in-person care (boxed quick list)
- Severe or rapidly worsening dyspnea, respiratory distress, or SpO2 persistently below 90%
- Uncontrolled hypertension >180/120 or symptoms of hypertensive emergency (chest pain, altered mental status)
- Signs of sepsis: fever with hypotension, lethargy, or organ dysfunction
- Uncontrolled bleeding or suspected fracture/major trauma
- Concern for evolving skin necrosis, rapidly spreading cellulitis, or suspicious malignant lesion requiring biopsy
ENT (ears, nose, throat) — scripting and safety
Pre-visit ask: “If possible, have your smartphone and a flashlight or a virtual otoscope ready.”
Ear exam script (patient/caregiver)
- Position patient with head tilted slightly away from clinician.
- If using virtual otoscope: turn on device, ensure light is visible, slowly advance until you can see the eardrum; stop if pain or bleeding.
- Clinician prompt: “Can you show me the eardrum? I’ll ask you to move slowly so I can see the entire canal.”
Red flags requiring escalation
- Suspected tympanic membrane perforation with significant pain or drainage
- High fever, severe ear pain, signs of mastoid swelling
- Inconclusive view due to cerumen or patient tolerance issues
Data note: Comparative studies indicate tele-otoscopy can diagnose many otitis media cases when image quality is adequate. Clinician training in image capture also matters.
Throat exam script
- Ask patient to open wide, say “ah,” and project light from phone flashlight toward the throat. Use caregiver to depress tongue with a clean spoon if patient cannot follow commands.
- Look for asymmetric tonsillar enlargement, exudate, or uvular deviation.
Skin and wound assessment
Photo/video quality checklist for patients
- Use natural light when possible; avoid harsh flash glare.
- Place a ruler or coin next to lesion for scale.
Script for wound inspection
- “Please stand/sit near a window with the lesion facing natural light. Hold the camera about 6–12 inches away and take one wide photo, then two close-ups from different angles. Place a coin next to the lesion for size reference.”
Red flags for in-person evaluation
- Rapid increase in size, spreading erythema, fluctuance suggesting abscess, systemic signs of infection (fever, tachycardia), bleeding not controlled by pressure.
Data note: Teledermatology meta-analyses show good diagnostic agreement for many conditions when high-quality images are provided. For suspicious pigmented lesions, in-person dermoscopy and possible biopsy remain gold standard.
Cardiovascular & respiratory — remote inspection and caregiver-assisted maneuvers
Visual inspection and caregiver palpation
Pulse and capillary refill
- Clinician script: “Please have your caregiver place two fingers on your wrist to find your radial pulse. Count beats for 30 seconds and multiply by 2; tell me the number.”
- For capillary refill: “Press on the fingernail for 5 seconds, then release and tell me how long color returns.”
Digital stethoscope use
- If available, coach caregiver on placement: left mid-clavicular 5th interspace for apical heart sounds, anterior lung bases for breath sounds. Record sounds and ask patient to take slow breaths.
RPM integration for cardiopulmonary complaints
Red flags (escalate)
- SpO2 < 90% at rest (local thresholds may differ) or persistent hypoxia despite supplemental oxygen
- Severe, unstable arrhythmias detected on wearable ECG (e.g., sustained ventricular arrhythmia, symptomatic rapid AF)
Data note: Studies show home BP and SpO2 are useful trend measures. However, they may differ from clinic values. The differences are due to cuff size, position, and technique. Wearable ECG consumer devices have good sensitivity for atrial fibrillation detection but are less reliable for other arrhythmias.
Section D — Interpreting RPM and Remote Vitals: Limits, Confidence, and Decision Thresholds
Keywords: rpm vitals interpretation telehealth, telehealth diagnostic aids checklist, remote physical exam techniques telemedicine
Remote vitals are powerful but imperfect. Interpreting them requires context: device type, patient technique, and clinical presentation.

Understanding device accuracy and common sources of error
Common error sources
- BP: wrong cuff size, cuff over clothing, arm below/above heart level, patient talking or moving during measurement.
- SpO2: poor perfusion, nail polish, cold extremities, sensor misplacement, motion artifact.
- Wearables: motion artifact, single-lead ECG limitations, variable electrode contact.
Practical checks to improve confidence
- Ask the patient to repeat abnormal readings twice after 5 minutes of rest.
- Confirm device brand/model when possible (some consumer cuffs are validated; look for validation listings).
- Ask about symptoms: numbers are helpful but must be interpreted alongside dyspnea, chest pain, dizziness.
Regulatory/validation context: The FDA maintains guidance on pulse oximeter performance. Professional societies publish BP device validation standards. Prefer validated devices for diagnostic decisions when possible.
Confidence levels & decision thresholds
Suggested confidence categories (clinician-facing)
- High confidence: clinic-grade upper-arm BP with validated cuff, repeat concordant readings; pulse oximeter validated consumer device with stable waveform.
- Moderate confidence: consumer validated upper-arm cuff with proper technique; wearable ECG with clear single-lead tracings for AF screening.
- Low confidence: wrist cuffs of unknown validation, single random phone-photo estimation of BP (unreliable), noisy stethoscope recordings.
Actionable thresholds and escalation rules (examples)
- SpO2: < 90% at rest — consider ED referral or immediate in-person assessment (adapt to local protocols). For patients with chronic hypoxemia baseline, compare to their known baseline and symptoms.
- Heart rate/arrhythmia: sustained symptomatic tachyarrhythmia or sustained ventricular arrhythmia on wearable — emergency evaluation.
Data note: Device-specific error rates vary by device and study. Guidance from clinical societies can provide insights. The FDA’s recommendations can help set local thresholds. When in doubt, repeat measurement and lean conservative for escalation.
Documentation language and medico-legal notes
Template phrases to paste into chart
- “Patient consented verbally to telemedicine exam and remote data capture at [time].”
- “Devices used: [brand/model if known]. BP reading 1: 152/92 mmHg at [time]; BP reading 2: 150/90 mmHg at [time]. Patient seated, arm supported at heart level.”
- “Pulse oximeter (finger probe) 94% at [time]; device: [brand if known]. Patient denies worsening dyspnea at time of measurement.”
- “Limitations: limited visualization of posterior oropharynx; poor lighting limited left tympanic membrane view.”
Medico-legal notes
- Document consent, devices, timestamps, and limitations explicitly — this reduces medico-legal risk and supports billing.
- Ensure vendor BAAs and encrypted data flows; advise patients when recording or screenshots are being saved in the EMR.
For coding details and required documentation elements, see telehealth billing and documentation.
Section E — Pros and Cons: Remote Exams with Peripheral Devices
Keywords: remote physical exam techniques telemedicine, telehealth diagnostic aids checklist, virtual otoscope use telehealth
Advantages
- Increased access and convenience: patients avoid travel and clinics handle higher follow-up capacity.
- Early detection and monitoring: RPM allows earlier intervention for trends (BP, SpO2, weight).
- Improved chronic disease follow-up: remote BP and wearable data support medication titration and monitoring.
Limitations and risks
- Device inaccuracies and measurement error can mislead care decisions if not interpreted conservatively.
- Patient technology and broadband gaps limit equitable access (rural and low-income patients may lack required devices or connectivity).
- False reassurance: inability to perform full abdominal, pelvic, or neurological exams means some conditions are easily missed remotely.
- Medico-legal exposure if consent, documentation, or vendor security are deficient.
Data note: Adoption rates for peripheral devices have increased. However, they remain heterogeneous. Barriers include cost, interoperability, and patient literacy, according to HIMSS and industry analyses.
Mitigation strategies
- Provide device-training materials and consider a clinic loaner program for high-risk patients.
- Maintain up-to-date BAAs and document consent and limitations thoroughly.
For mental health workflows (device-free), compare process differences and program structure in telehealth clinical program examples. Device-heavy workflows require tighter technical support and logistics than purely behavioral teletherapy workflows.
Section F — Best Practices & Key Takeaways for Clinicians
Keywords: video guided physical exam protocols, patient self exam instructions telehealth, rpm vitals interpretation telehealth
Quick summary: Use structured workflows. Apply validated devices where possible. Repeat abnormal measurements. Document device and consent explicitly. Set conservative escalation rules.
Quick checklist for every remote physical exam
Pre-visit
- Confirm patient has camera-enabled device and list of available peripherals.
- Send pre-visit instructions for device use and lighting.
- Schedule caregiver if patient may need assistance.
In-visit
- Obtain verbal consent and document time stamped.
- Verify device on camera; observe measurement technique.
- Repeat abnormal RPM/vitals once after rest.
- Perform targeted video-directed exam using scripts.
Post-visit
- Document device brand/model (if known), timestamps, and limitations.
- Provide clear escalation instructions in writing and by phone if needed.
- Arrange follow-up RPM or in-person appointment based on risk.
Short clinician scripts and patient instructions (copy-paste ready)
BP measurement
- “Sit quietly for 5 minutes. Place the cuff on your upper arm (not the wrist). Sit with feet flat and arm supported at heart level. Start the device and read me the pressure result. If it’s high, we’ll repeat once more after two minutes.”
Pulse oximeter
Ear photo using smartphone
Caregiver palpation for edema
- “Press two fingertips over the bony part of the shin for five seconds and then release. Tell me if a pit stays and how deep it looks.”
Implementation roadmap for clinics
Pilot program (6–8 weeks)
- Select single complaint (ENT or skin) for pilot and choose 1–2 devices to support it.
- Train 2–3 clinicians and scheduling staff on scripts and documentation templates.
- Establish loaner device pool or patient-facing device list.
- Track metrics: visit length, escalation rate to in-person, patient satisfaction, diagnostic concordance (if follow-up occurred).
- Scale gradually with procurement checklist and EMR integration plan.
Key operational metrics to track
- Percentage of visits using peripheral devices
- Escalation rate to in-person care
- Patient satisfaction and technical success rate (ability to obtain diagnostic-quality image/sound)
- Time per visit and clinician time savings
For preoperative coordination that includes nutrition and behavioral assessments, see our preoperative telehealth workflows resource.
Frequently Asked Questions
### Q: What devices should I ask patients to have for a routine telemedicine visit?
Start with a phone or tablet with a camera. Use a validated home upper-arm blood pressure cuff if hypertension is in the problem list. Include a pulse oximeter for respiratory complaints and recent photos of skin issues. For complaint-specific needs, add a virtual otoscope or digital stethoscope when available.
### Q: How reliable are home BP and SpO2 readings during telehealth?
Reliability varies by device quality and patient technique. Clinic-grade, validated upper-arm cuffs and repeat measures after rest give the best confidence. Pulse oximeters are generally accurate for detecting moderate-to-severe hypoxia, but low perfusion and motion artifact reduce reliability.
### Q: When should I escalate to an in-person assessment?
Escalate for severe or worsening dyspnea. Escalate if SpO2 is persistently <90% (or below the patient’s baseline if there is chronic lung disease). Escalate in cases of hypertensive urgency (>180/120 with symptoms). Suspected sepsis, uncontrolled bleeding, or rapidly progressive skin infection are also reasons to escalate. Use the boxed escalation checklist in the article.
### Q: How do I document RPM and remote exam findings for billing?
Document verbal consent, platform, and devices used, specifying the brand and model if known. Record the timestamped measurements and the exam maneuvers performed. Note any limitations and provide the clinical decision-making rationale. See our telehealth billing and documentation page for CPT and RPM coding guidance.
### Q: Are consumer devices good enough or should clinics provide devices?
Consumer devices can be adequate for screening and trend monitoring; clinical-grade devices provide more reliable data for diagnostic decisions. Consider loaner programs for high-risk populations to ensure consistent, validated measurements.
### Q: What are the privacy and legal considerations when using peripheral devices?
Ensure vendor BAAs, secure encrypted transmission, and explicit patient consent for data capture and recording. Document consent and follow CMS/state telemedicine regulations and payer documentation rules.
### Q: Can remote exams replace in-person exams long-term?
Remote exams can substitute for many focused evaluations. They improve triage and monitoring. However, they do not fully replace comprehensive in-person exams for certain diagnoses. Use remote exams as a complement — a triage/monitoring tool rather than a complete replacement.
Best Practices / Key Takeaways
- Standardize a minute-by-minute visit template to reduce variability and improve throughput.
- Require pre-visit device checks and send short patient how-to guides.
- Prefer validated upper-arm BP cuffs and repeat abnormal RPM readings for confirmation.
- Use conservative escalation thresholds and document all device data and consent with timestamps.
- Start small: pilot one complaint workflow (ENT or skin), track escalation rate and satisfaction, then scale.
- Ensure vendor BAAs and EMR interoperability before procuring clinical-grade devices.
- Train staff in patient coaching and caregiver-assisted maneuvers; practice makes better captures.
- Use asynchronous uploads for images in low-bandwidth contexts to preserve diagnostic quality.
Sources & Further Reading
- Centers for Medicare & Medicaid Services (CMS) — CMS information and guidance on remote patient monitoring and telehealth billing: https://www.cms.gov
- Pew Research Center — Internet / Broadband statistics and smartphone ownership: https://www.pewresearch.org/internet/
- McKinsey & Company — Telehealth industry analyses and market trends: https://www.mckinsey.com/industries/healthcare/our-insights
- HIMSS — Telehealth adoption and digital health interoperability reports: https://www.himss.org/resources
- FDA — Consumer pulse oximeter and device performance information and guidance: https://www.fda.gov
- A 2020–2023 body of literature in Telemedicine and e-Health and related journals documents diagnostic concordance of tele-otoscopy, teledermatology, and digital stethoscope recordings; see journal searches for condition-specific comparative studies (e.g., otoscopy, teledermatology meta-analyses).
- Vendor market listings and procurement pages for device cost ranges (search common vendors for current pricing and technical specifications).
Internal resources (for implementation and billing)
- Teletherapy Billing Codes 2025 – Documentation & Payer Rules — telehealth billing and documentation: https://kellyjohnstontelehealth.com/teletherapy-billing-and-reimbursement/
- TeleHealth Mental Health Services — telehealth clinical program examples (contrast with device-heavy workflows): https://kellyjohnstontelehealth.com/telehealth-mental-health-services/
- Preoperative Telehealth Optimization – Nutrition & Mental — preoperative telehealth workflows: https://kellyjohnstontelehealth.com/prep-for-surgical-patients/
- Telehealth: Solution for Mental Health in Rural Areas — telehealth access in rural areas: https://kellyjohnstontelehealth.com/telehealth-a-solution-for-mental-health-in-rural-areas-expanding-access-and-impact/
- Kelly-Johnston TeleHealth Blog Page — telehealth resources and updates: https://kellyjohnstontelehealth.com/blog/
Appendix (Downloads & Copy-Paste Snippets)
- One-page printable clinician checklist (refer to the “Quick checklist” above).
- Copy-paste patient scripting snippets for BP, pulse ox, ear photos, caregiver palpation (see scripts in Section F and Section C).
- Device comparison (text version):
- Pulse oximeter: consumer $20–70; clinical-grade $100+; use for hypoxia screening, watch for low-perfusion errors.
- Upper-arm BP cuff: consumer $30–120; clinical-grade $100–300; validated upper-arm cuffs preferred.
- Virtual otoscope: consumer $100–300; clinical-grade $500+; helps diagnose otitis when image quality is good.
- Digital stethoscope: consumer/entry-level $100–400; clinical-grade $300–1,500; useful for heart/lung sounds but limited by ambient noise.
- Documentation template snippets: see Documentation & coding checklist in Section A and Documentation language in Section D.
Conclusion
Remote physical exams use structured workflows, targeted diagnostic aids, and careful RPM interpretation. These methods can safely expand telemedicine’s clinical reach and efficiency. The keys are reproducible protocols, realistic device selection, consistent patient coaching, and conservative interpretation of remote vitals. Start by piloting a single complaint workflow. Choose either ENT or skin. Do this for 4–6 weeks. Track escalation rates and monitor patient satisfaction. Use this data to iterate.
Actionable next steps include downloading the one-page clinician checklist. Pilot a focused workflow. Review telehealth billing and documentation guidance before rolling out clinic-wide.
For deeper billing templates and CPT/RPM code guidance, see telehealth billing and documentation. For ongoing clinic tips and updates, visit telehealth resources and updates.